Manual WordPress Istallation
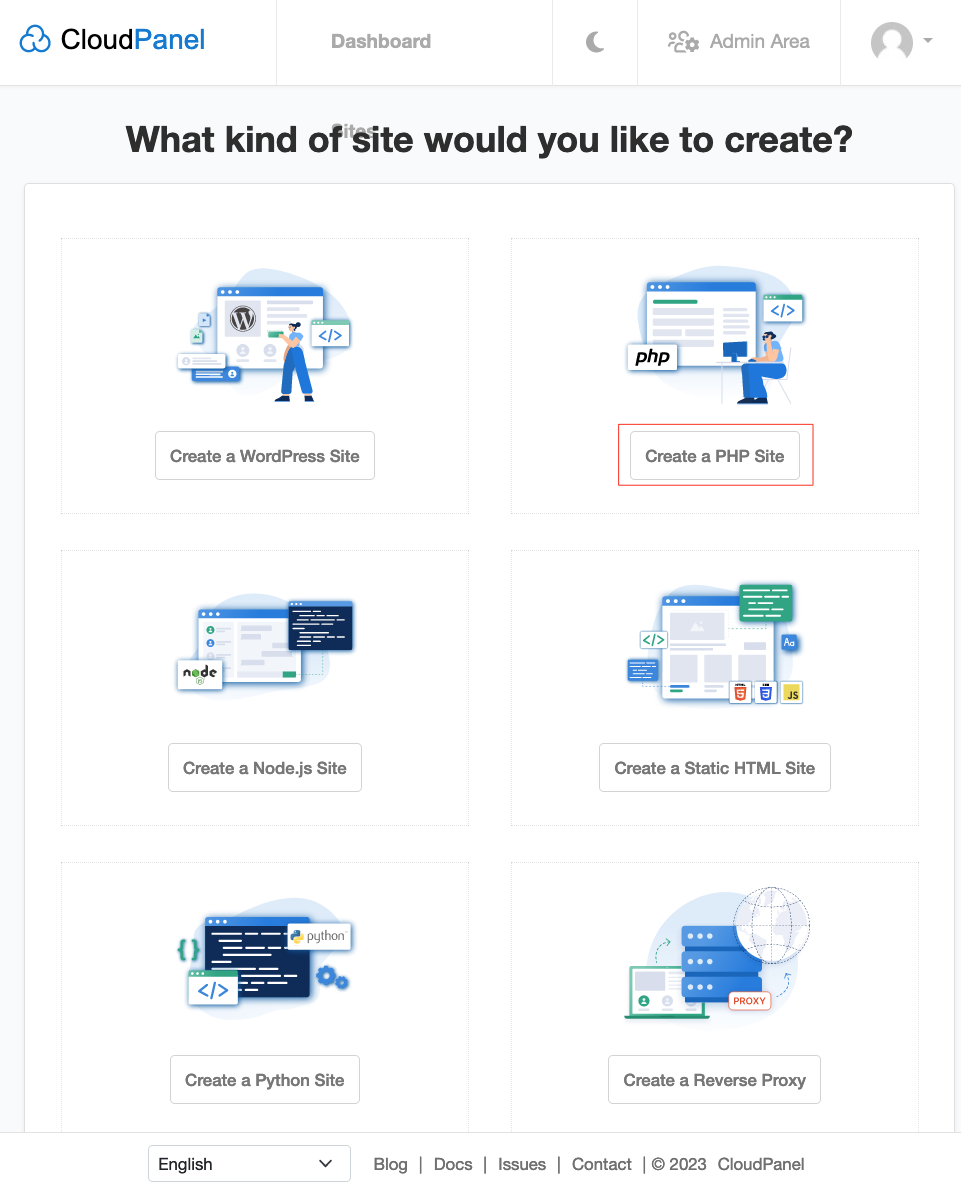
Add Site
- Click Create a PHP Site
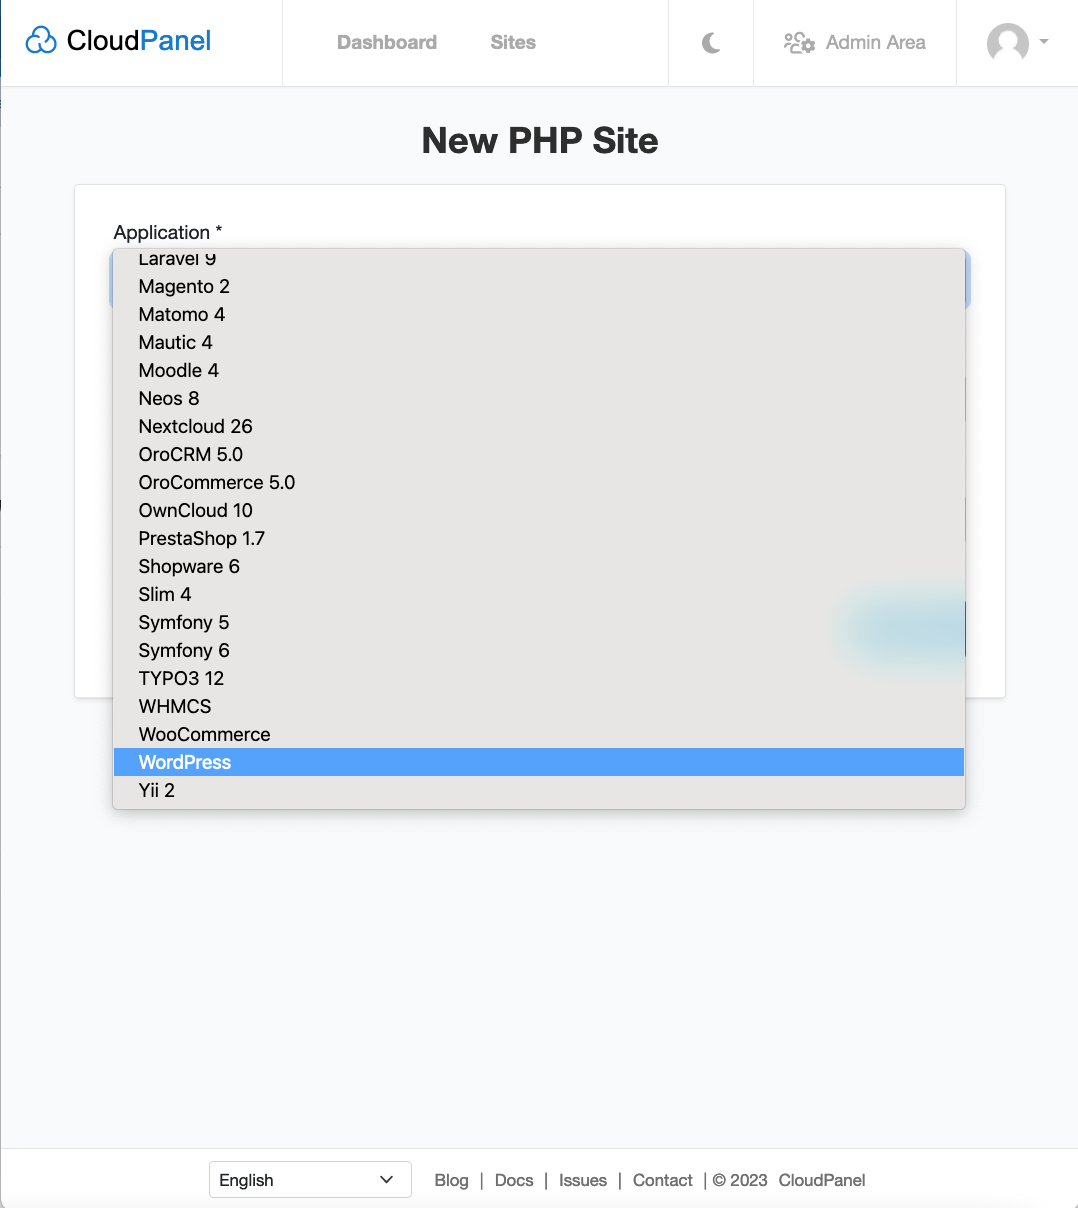
2. Select WordPress from the drop-down.
3. Enter the details in the form for your domain and click create.
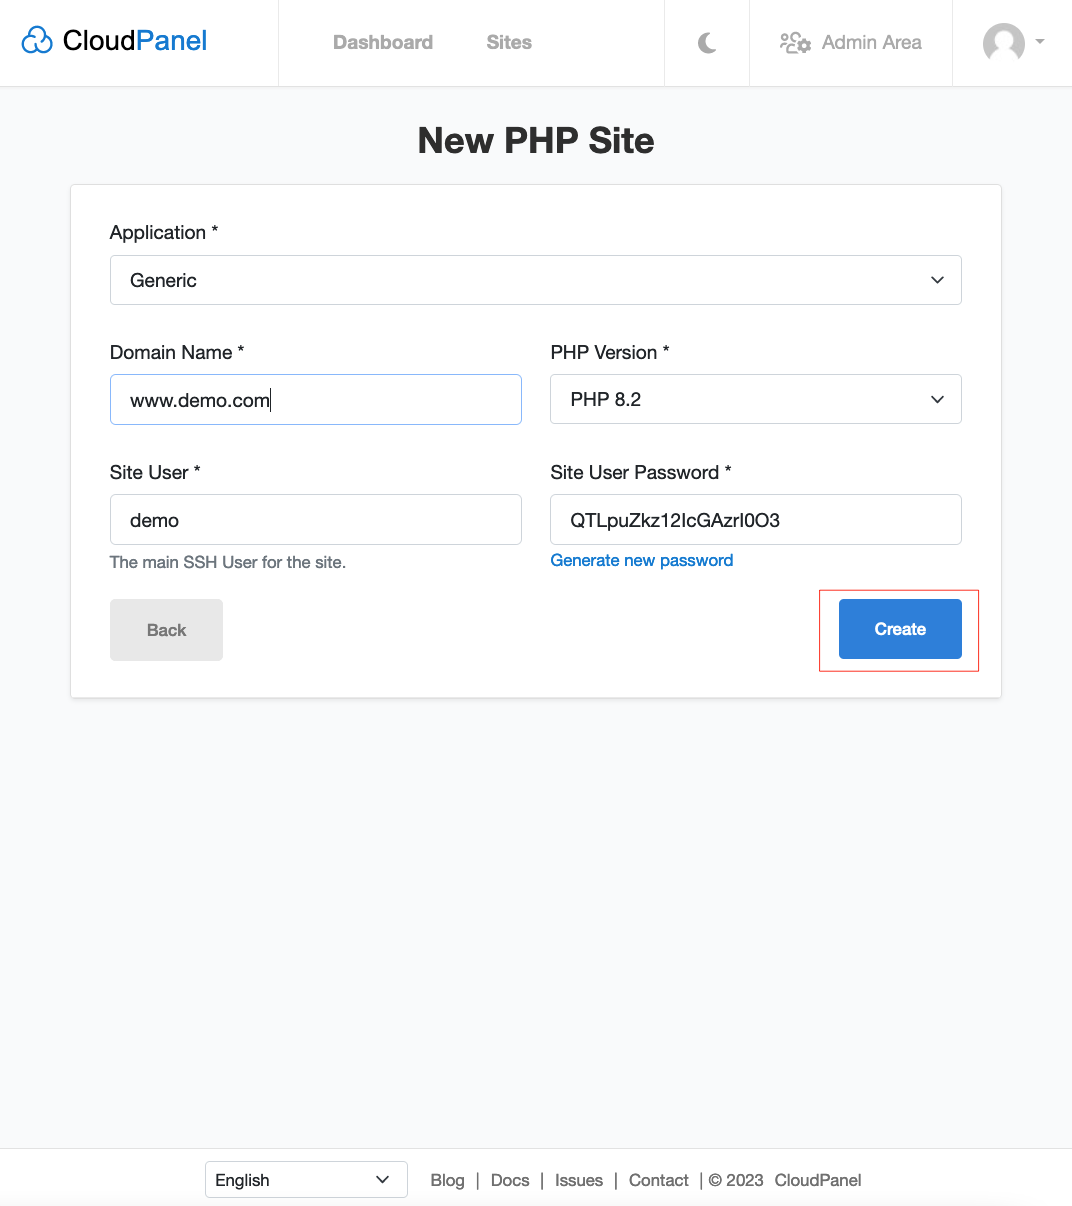
www vs non-www
In the Domain Name field you can enter your website address with or without www. With www it will display the URL as https://www.domain.com and without www it will display the URL as https://domain.com. Based on what you have selected an entry for the same will be generated in the vhost of the site.
SITE USER
The Site User is an SSH User. All files will be stored in his home directory: /home/$siteUser
4. Click on manage site, then click on Databases and click on Add Database. Fill in the form and save it.
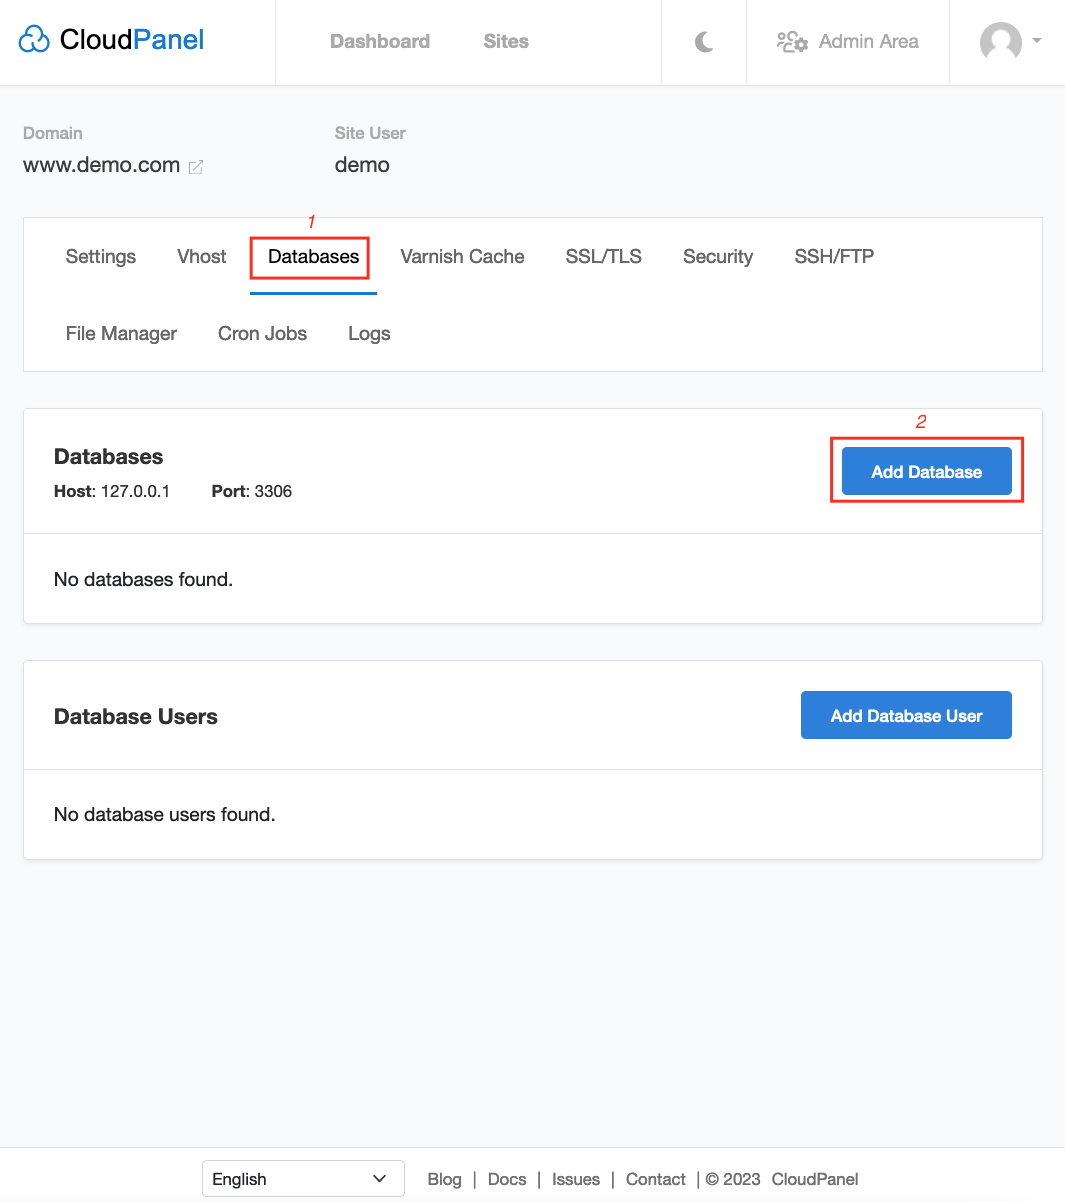
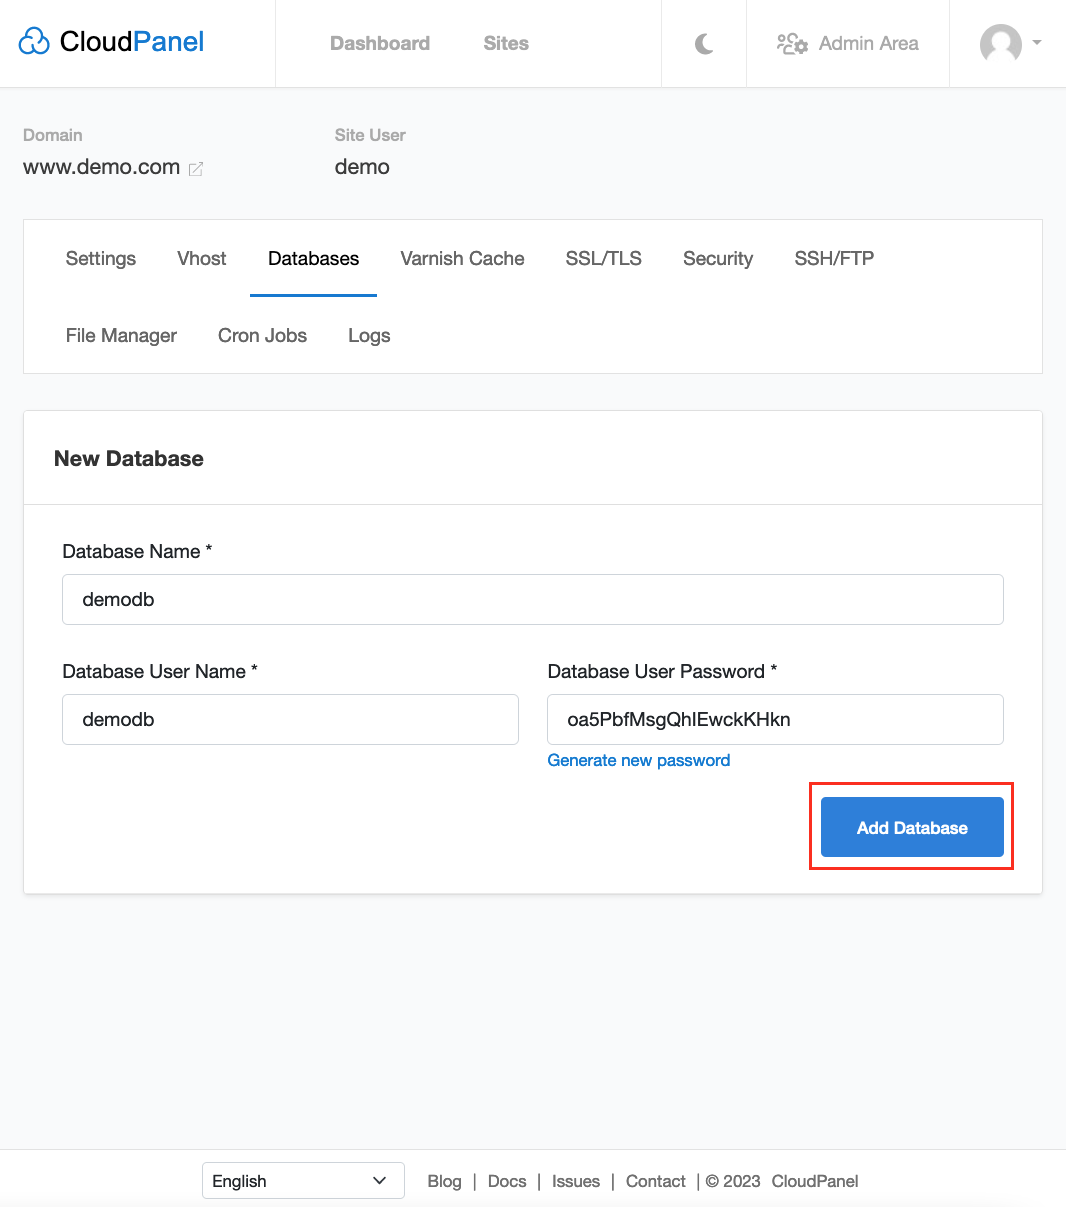
Do not use underscore, in the name for database as that is not supported in CloudPanel.
5. Download WordPress from the official site. You can download the required version or download the latest one depending on your requirement.
Official WordPress Download Link
Pro Tip
You can download the WordPress.zip file directly into the web root folder of your site using wget.
Browse to your websites home folder using ssh and type the following command.
wget https://wordpress.org/wordpress-6.2.2.zip6. Upload the WordPress.zip file to the web root folder of your website.
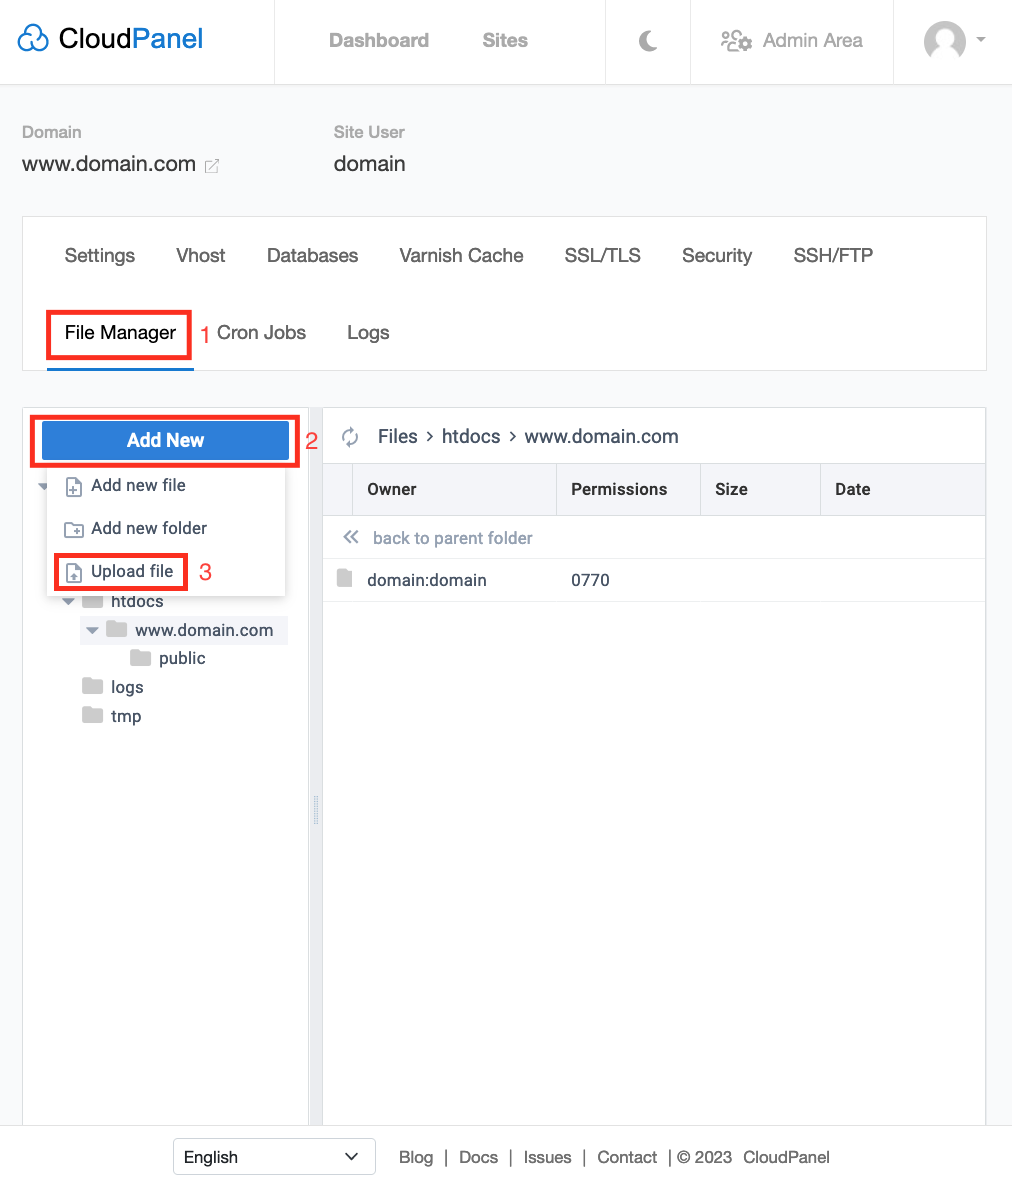
7. Extract the contents of the WordPress.zip file. Browse the extracted folder and select all the files, cut and paste the contents into the web root folder i.e /www.domain.com. You can delete the WordPress.zip file and the empty folder.
8. Now, visit the url www.domain.com. This will load the WordPress installation wizard. Follow the steps and complete installation.
Congratulations! you have successfully installed WordPress manually on CloudPanel.